1. Go to the “Devices” section of the portal.
2. Double-click on the device to open up its menu.
3. To assign an extension to the device:
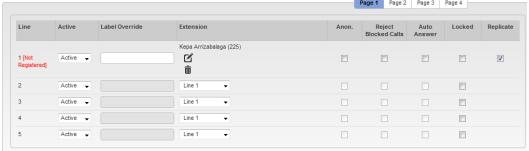
a. Click on the (Disabled) drop down underneath Extension, and then select Extension. The screen will then change and show the below image once Extension is selected:

b. Click on the pencil in the pad icon to open up a new window, which will ask for an extension to be chosen.
c. Once an extension is selected, it will then show that extension on line 1:

d. The next step is to replicate your lines, which will make call waiting easier and give you more lines to use, click the checkbox underneath the word replicate (see image above). For the phones with interactive images, open up the first line and then select replicate. The screen will then look like this:
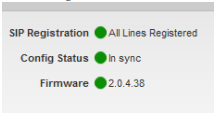
4. Once you assign the extension to the device, the SIP
Registration, Config Status, and Firmware will look like this:
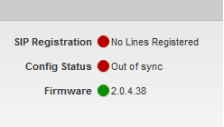
5. If the phone has not been configured before (brand new), then SIP will be red and Config and Firmware will be yellow (it will say not initialized).
6. Click “Save & Reboot” on the top left to save your changes and generate a new configuration file.
7. If the phone is plugged in, unplug the power from the back (if you do not have a power cord, unplug the ethernet cable in the internet port) and then plug it back in. If the phone is not connected, connect an ethernet cord to the internet port, and then plug the power cord back in.
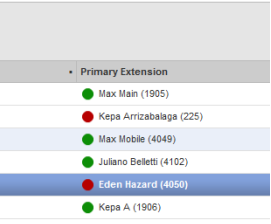
8. While the phone is powering up the dot next to the primary extension for that device will show red, it will turn green once the phone finished booting up and registers.
9. To confirm that the phone fully updated and is ready to go, double-click the device to open it up, and make sure that the 3 dots next to SIP, Config, and Firmware are all green: